
Recon Imager V4.0.5 - Sumuri
by Jon Munsey - November 2019


RECON IMAGER HAS BEEN REPLACED !!!!
Since this review was written a while back, Steve Whalen over at Sumuri has been in touch and said that Recon Imager's functionality has now been merged into a new product known as Recon ITR (Image, Triage and Reporting) which in addition to imaging, allows you to triage (view) and generate reports on data found on the Apple computers hard drive.
Its priced at $1199 and includes a 500GB SSD and a smaller USB memory stick to store collected data on. A full review will be here soon, so subscribe to the newsletter to be notified when !
Recon ITR allows you to quickly examine the data most critical to most investigations, ideal if your shop can't run to the cost or Blacklight or Recon Lab.
1. About This Review:
I've been in the industry for 17 years, so I have seen it all and dealt with both great and poor vendors and their products. Hopefully this review will help you make up your mind if you are considering this particular product, or are looking for a product that does the same thing!
This is a long review, so grab a cup of tea and a biscuit or two - I do zoom off on tangents and tell you things you already know, so enjoy the read.
You can always scroll down to the conclusion and score section at the bottom of the page if you are in a hurry!
I don't get paid to review software or hardware, this is an independant review with an injection of humour and a dash of satire - you won't see anything like this on PC Pro or SC Magazine!
So this week we have a review of Sumuri's Recon Imager product, its a plug and play tool that allows you to image all shapes and sizes of Apple Macintosh computers and laptops.
 No, you don't get a box like this.
Is it any good ?, should you buy it ?, would I buy it ? (and man, I am tight, so it would have to be good), well, lets take a look at it!
2. The Gotcha! & ProTip System:
Throughout reviewing products, I alway see things that could trip you up as an investigator - costing you time, money or embarrassment in front of a client.
If you see a Gotcha!, it does not mean the program on test is broken, buggy or has something seriously wrong with it - what it means is to take care and don't make the same mistakes that I did during the review!
If you see a ProTip, it means there is something I do here that our younger readers may find useful and our older readers can disagree with.
3. About The Vendor:
Sumuri was founded circa 2010 by Steve Whalen, hailing from a law-enforcement background of some 15 years with the Delaware State Police in the USA (I like him already).
Steve developed many training courses for Mac forensics and has, so I read, acted as a consultant to a number of forensic software vendors over the years.
Notably he had a major hand in making Raptor (remember that linux based forensic distro !!!!!), Paladin (another distro) and various other tools including Recon Imager.
He knows his onions.
I will be reaching out to Steve for a vendor interview - subscribe to the newsletter to be notified if this happens!
I had a poke around their website (see below, click to enlarge), lots of black.... lovely. Notably they have prices on their website and you can buy directly.
Don't you just hate vendors that have "get a quote" or "click here for pricing" and its a form you fill in and then they decide how much they are going to rob you for based on your answers. Well done Sumuri for keeping it nice and transparent - your customers like that!
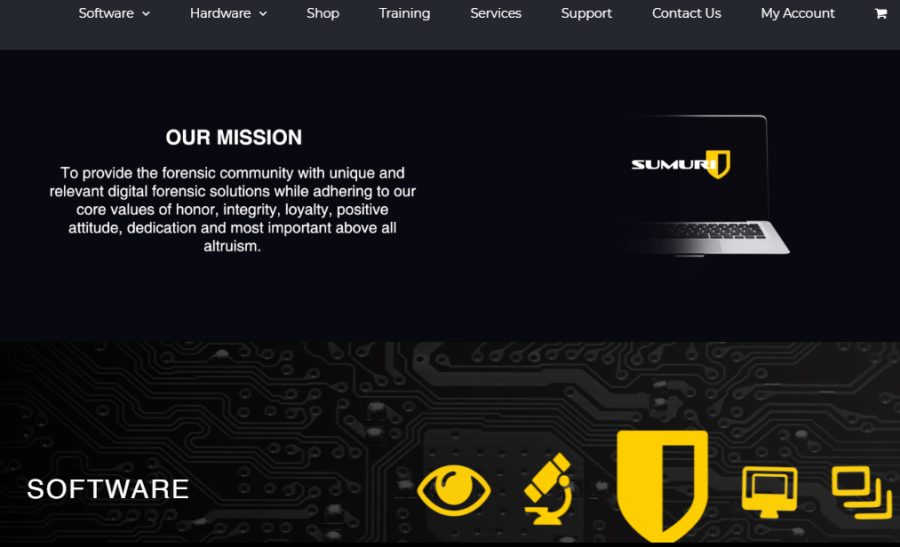 Sumuri Website
The company seems to be quite small, with around 11 employees total, which immediately tells me that support should be knowledgable and fast, it also tells me I am not going to be calling an outer-mongolia support centre and talking to a script reader when I have a problem.
If you are wondering what the name Sumuri means, its "to examine, to audit" according to an online dictionary... very apt.
They also have the Talino division, which provide high specification forensic workstations, field kits (laptops) and servers for data processing.
Subscribe, you never know you may see a review of some Talino kit here !
4. Features:
Recon Imager comes in two flavours, the Standard version and a Pro version, today I'm reviewing my standard version, until I did my research for this review, I didn't know the Pro version existed.
Standard Version:
- APFS fully supported.
- Image all Intel® Based Macs, including the MacBook Pro with Touch Bar adn those with T2 chipsets.
- Create decrypted FileVault images.
- Rolling updates to support all new Macs.
- Image Mac RAM without an admin password.
- No need for hardware write-blockers.
- Fusion Drive Support.
- Apple Core Storage Support.
Pro Version - Includes all of the above Standard features plus:
- Ability to selected individual folders or files - aka Logical imaging (Similar to .AD1 or L01 logical
images).
- Automatic macOS artifact extraction which can be manually processed or automatically processed in RECON
LAB.
Pro is only any good to you if you are using Recon Lab which is Sumuri's forensic suite for investigating Apple disk images (Think Encase, FTK, etc) - as the logical image files and artefact collection feature produce proprietary image files to the best of my knowledge. To be clear, the ram and disk images it creates are all industry standard formats.
I would like to take a long term look at Recon Lab, as I think Mac forensic suites are relatively niche, if you compare the number of Windows machines I see vs Apple Macs. Sadly due to budget constraints, this won't be happening any time soon in my lab, unless Sumuri send me a licence for a long term test.
So, in a nutshell, if you just want to image the target mac and analyse it with your own tools from other vendors, Standard is the one for you.
5. Pricing & Renewal:
Pricing:
At the time of writing, the Standard edition of Recon Imager costs £310/$399/€358, with the Pro edition coming in at £621/$799/€718 all plus shipping and any local sales taxes.
I think this is pretty reasonable and the licence is perpetual, meaning that you are purchasing the product and not signing up to a toxic rental agreement (meaning you can still use the product after the SMS has expired).
Renewals:
Renewals, renewals, renewals..... don't get me started on this subject..... to most American software companies this is the polite word for extortion or racketeering.
Al Capone is long gone, here in the UK the infamous Kray twins of the east end of London are but a distant memory, so how does this practice continue and are Sumuri participants ?
With Recon Imager, you receive 12 months of SMS as per usual, the licence is perpetual and they are very up front with pricing and what happens when your SMS expires. This is a good start, tell me more....
Perpetual is good for customer relations, if I buy something I expect to be able to use it forever (even if it is out of date), if I rent something then I understand (as I am not a total idiot) that I can't use it when I am not paying rental. So Sumuri's choice of the perpetual route is a smart one and sits well with me.
So what happens when your SMS runs out, as my friend Marcus would say "you are shmuck with a paper weight"..... er no, its quite elegant;
Up to 3 months after your SMS has expired you can simply pay the renewal price and be back in business, no expired SMS extortion, just a nice 3 month grace period to get organised, get the budget sorted and get a renewal.
If you let it go into the 4th month after your SMS has expired, the renewal price is no longer available and you have to pay the full price for a new licence.
It is an interesting way of doing things, but hey, thats fair enough in my book!
What is not ok is charging the renewal fee AND then wanting you to pay for all of the months your SMS has been expired. Sumurai don't do that, so in answer to the earlier question, no, they don't extort you when the SMS run out. Nice one Sumuri!
Look out for that upcoming article on extortion surrounding SMS expiration, subscribe, its going to be a good read and ruffle some feathers with the vendors who have, in my opinion, mob like practices! I have a lot of research to do on that one.
A renewal of your Recon Imager licence will cost you £115/$150/€134 for the Standard edition and £230/$300/€268 for the swish Pro edition.
In your humble reviewers opinion these are fair prices, especially when compared to the competition which is *much* more expensive.
6. Purchasing Process:
I purchased Recon Imager (I have got to stop purchasing stuff, I run a blo*dy review website after all, does PC Pro magazine buy stuff....*grin*) last year, specifically to image the new Apple Mac's that had a) The new T2 security chip and b) The new APFS file system (don't get me started on APFS - but hey, thats another upcoming article...subscribe!).
I had been previously using a mixture of Linux forensic builds (Such as Paladin, and Raptor) to boot Macs, but due to the hardware changes made by Apple, machines would no longer boot using those Linux builds. Recon Imager V3 was the answer, it booted everything at the time of purchase last year (last year was software V3).
I was going to go with something from Black Bag (Steve Whalen has just spat his coffee all over his monitor, I mentioned BB....*grin*), but the cost was much more expensive for a similar product (£1100/$1400/€1260 for the corporate version at the time of writing), and being a small independant shop, I have to be careful where my budget goes. So Sumuri got my money.
When I purchased my dongle for Recon Imager Standard, it was really straight-forward, I visited the Sumuri website, added it to my shopping cart, checked out and I was done.
If you can't pay by credit card (if you are law enforcement for example and need to do a purchase order) then you can email them at sales@sumuri.com or call their sales hotline if you need some help.
The package was shipped expedited FedEX and arrived here in the UK safely, you may end up paying VAT or some form of customs tax in your region as this is an imported product, so be mindful of that when attempting to calculate the final price for the bean counters in your organisation. You wouldn't want them to deduct that from your salary :)
7. Product Download/Unboxing:
There is no downloading of Recon Imager, this is a physical product, so lets get on with the unboxing. This is not Youtube, so I'm not going to show you opening a cardboard box and cutting packaging tape....
The product arrives in a FedEX box, no frills here, the sleek black boxes that you see on their website don't actually exist - it's all for show, as I didn't receive one. I don't actually want one, but you might !
 Wheres my shiny box from the online store ?
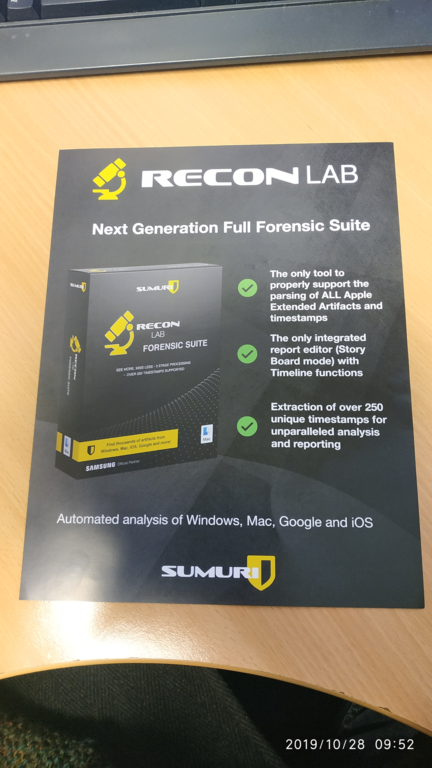
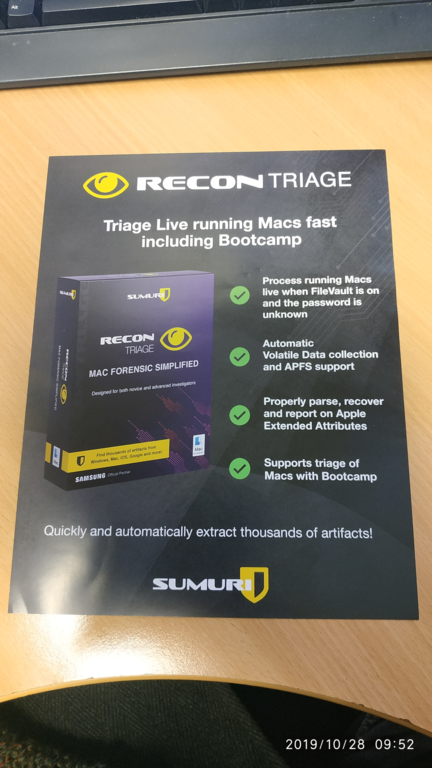
Inside is some rather nice marketing material detailing Sumuri's other products and their Talino forensic computer's range, a series of A4/Letter size sheets boldly lists their products - very professional, I read them all - you got my attention.
I liked them so much I've put them below in this gallery so you can take a look, click to enlarge.

There is also a quick start guide of sorts for Recon Imager, it tells you where to download the manual and tells you what happens to you if you let your Software Maintenance Service (SMS) run out (They send the boys round... no... just kidding).

In my humble opinion, a quick start guide should really be along the lines of;
1) Determine what Apple computer you are using (if permitted - Finder, About this mac)
2) Press the Option key (or left alt if using a PC keyboard
3) Choose mode A, B or C
4) Plug in your destination disk, format and label
5) Start imaging ram or disk to your desired format
6) Read the imaging summary that appears at the end of imaging
7) Power off
I guess this falls into the "you can't please everyone all of the time" category.
But hey, its a nice addition to the package and makes you feel as if someone has put effort and thought into what the customer sees when they first open the package, first impression my friends - are everything! I did have a warm feeling.
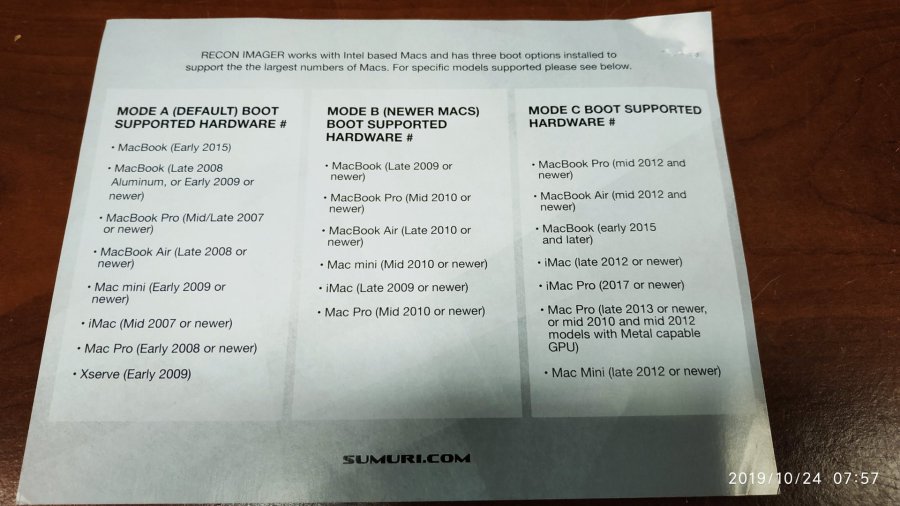
On the flip side of the quick start guide is possibly the most useful piece of information you will take away from this review, a nicely laid out chart showing you which version of Recon Imager to use for the relevant Mac (more on that later).
You really can image any Apple computer with this single product (apart from early PowerPC based ones), but hey... they are in the landfill site or Smithsonian by now.
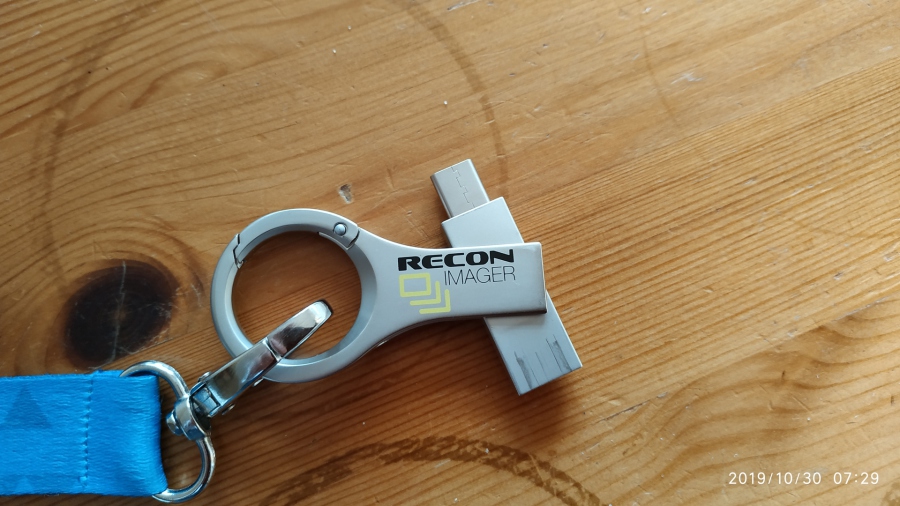
The actual Recon Imager dongle (well ok, USB stick) comes in USB C form on a USB 3.1 memory stick, which you can plug directly into any modern Mac.
For the peasant custodians that you may come across that can't afford a new machine with USB C, there is a USB C to USB A adapter included, meaning your bog standard USB 3 port will work just fine, as will a medieval USB 2.0 port.
Pro Tip: Some people have reported that their Mac will only boot from an external USB device using certain USB ports - so if you run into trouble, try all the ports!
Pro Tip: This does not work on Windows based PC's, you will see a video from the early 1.0 days of Recon Imager referenced later in the review saying it does work on PC's, not with V4 that functionality has been lost - use Paladin (Or CAINE its free) if you want to do that.
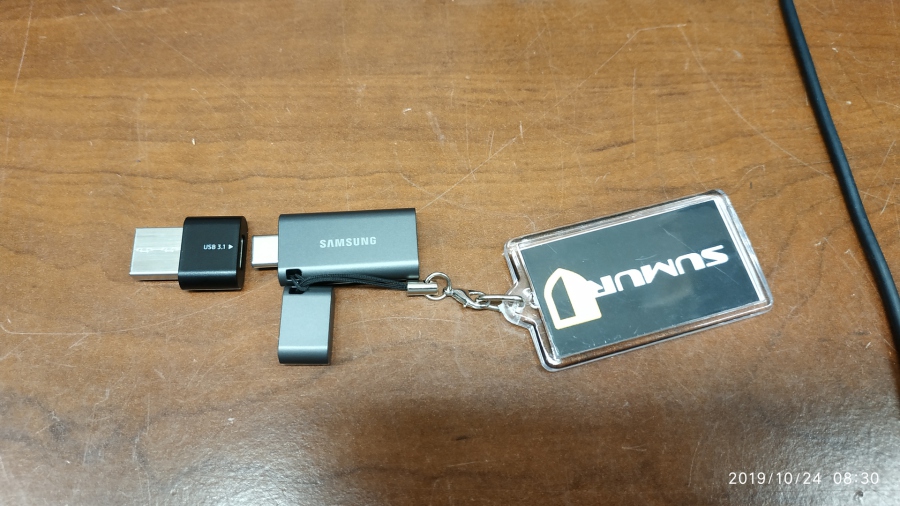 Recon Imager Dongle USB C Configuration
Gotcha! The guts of the dongle are in the silver part, so don't be a lemon and plug just the black adapter into your machine - you will be wondering why nothing is happening if you do. If you are using old school USB A, connect it all up (see picture below) before you start.
Did I mention you get a free keyring ?
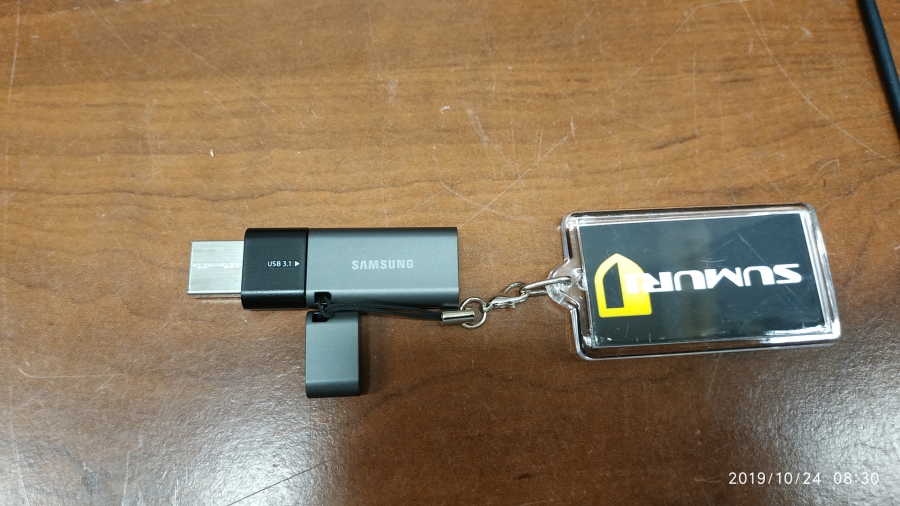 Recon Imager Dongle - USB A Configuration
According to Roni the sales guy, this is the latest vesion of the Recon Imager dongle, made by Samsung - they had some issues/limitations with the older dongles - hence the switch.
What do I think of the new ones ?
It does not look very professional if I am honest - it costs a few hundred quid/bucks to get memory sticks etched with a logo in bulk - heck, you can even put a good looking sticker on it, but just sending out unbranded Samsung memory sticks cheapens the whole thing, no Sumuri keyring is going to offset that.
Marketing 101 - guys and girls, branding is your identity!
I am surprised at this, as the last dongle I had was a quality item, and was unmistakably Sumuri due to the etched logo and funky design.
If this was something I bought on Ebay, like a dodgy copy of CAINE (a forensic linux environment) for $5 - unbranded is fine, but for something that can cost almost £800/$1000 I expect a branded item period.
Maybe Sumuri are in the process of having them labelled and mine was sent out in advance of this process, so lets hope this is going to change!
As I said, I much preferred the older dongle (see below) which was an all in one item, it had USB A on one end and USB C on the other end, nothing to fall off and nothing to lose in your kit bag. In my opinon, from an engineering standpont, this is a step backwards.
 Older style dongle
Pro Tip: As you have probably gathered, I'm not exactly a spring chicken any more, so I like a long lanyard for my dongles (see below), so I can find them easily and they don't get left in machines (Doh!) - so tip to Sumuri, chuck in a chunky lanyard for us older and more forgetful investigators! Don't use teamviewer though (Google it!).
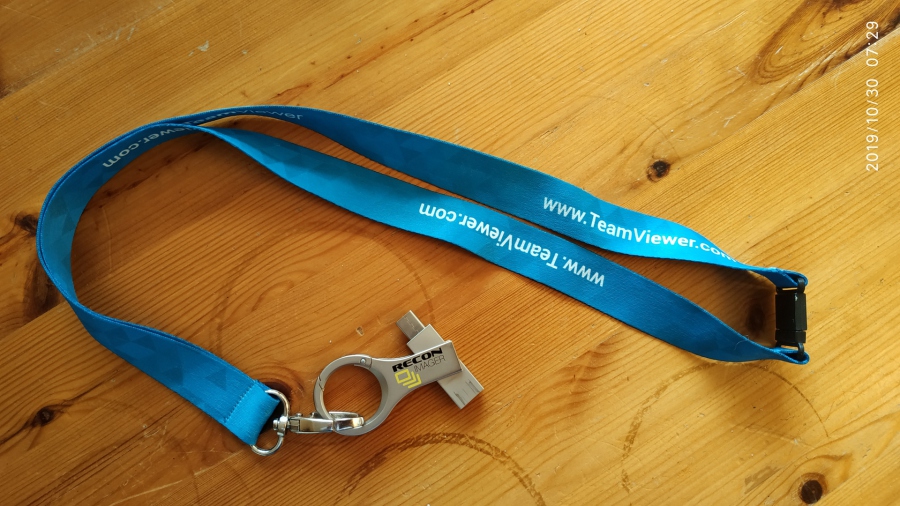 Dongle "anti-leave-in-custodians-machine" device
7. Further Resources & Reading:
Sumuri's website is nice and clear, its easy to navigate around to find the material you are looking for.
They have a Blog which you can read here, they also have the User Manual online here which you really should read before you start. Let me say that again, which you really should read, in full, before you pick this thing up.
If you don't read the manual, there is a possibility that you will boot the target Mac to its internal hard drive and that could be a problem (especially if you are working in law enforcement).
They also have a good News section which you can read here, along with a really good article "Mac Forensics Best Practice" which can be found here and is worth a read before you start with Recon Imager.
The manual is not long, so all of you millenials with attention deficit disorder will make it through no problem. It contains all the information you need to avoid Gotchas!
The manual made me laugh; (check out section 4.1 as an example)
"Other than RECON LAB, there are no forensic tools that fully support all of Apple’s proprietary file systems, technologies, and artifacts.
RECON LAB is the only forensic suite designed completely on a Mac to natively support Mac images and its data."
This dates back to the APFS wars when Sumuri and Black Bag were duking it out over who would be first to support it. This needs to be updated or removed as it is not true now in my opinion.
On a more positive note, I am not religious, but there is a God, as you don't have to log in to the Sumuri website to access the manuals - hallelujah. I'm not sure if they are hiding their other software downloads behind a login prompt, lets hope not. Kudos to Sumuri.
Finally Sumuri have a great Youtube channel, check it out here, but only after you have read this review :)
Well stepping back and looking at what we have seen up until now, so far so good people, lets fire up the quattro and see what this thing can do then.....
8. Using the Product - Booting an iMac (Late 2009)
I have an elderly iMac, late 2009 which I currently run High Sierra on, 8GB of RAM and a 500GB SATA drive. Its not been used much, its mainly a testing unit which I purchased off E-Bay a couple of years ago cheap as chips (it has marks on the screen, but for me, that was not an issue).
If it does give me any problems, I'm sure Louis Rossman (a popular independant Apple Mac repair man in New York, USA) would be happy to help me get the thing back up and running, when he is not in court tearing up Apple for a*se paper (video here).
Holding down the Option key on the Mac's keyboard (hey, this Mac was cheap, I don't have an official keyboard, I have a PC one, so its Left ALT for me) before you turn the power on will bring up the Boot Menu, allowing you to choose which disk you want your Apple to start from, take a look below;

Pro Tip: If you don't see this screen, but instead see a padlock icon (see below), your custodian (or his organisations I.T team) have enabled a firmware password, which will need to be removed or circumvented if you want to image anything.
 Firmware password enabled boot manager screen.
Now at this point, be careful here as if you click the two hard drives to the left (the silver ones above) you will boot the Mac to its internal hard drive which is going to change the timestamps on a zillion files and write to all sorts of files.
Pro Tip: Its a scary prospect, especially if it is a criminal case - where if you did boot the machine into the native OS, you could jeopardise the case, or at least have to write a lengthy report explaining what went wrong and how this happened.
My advice is always always check that the keyboard is properly plugged in and that it is a known good keyboard - otherwise you may not see this screen and just sail right on into Mac OS, OSX, or iOS whatever they call it these days. I always use a keyboard with a light on it, so I can at least see if the USB port is working (or giving out power) - USB ports are often broken on custodians machines.
The days of whipping out the computer's hard drive (for most apple products) has long gone, unless you feel like removing an iMac's screen or using special NVME/PCIE and other adapters to access the solid state drives that Apple are using these days.
So as you can see in the image above, you have 3 USB volumes that you can boot from, A, B & C. These correspond to the quick start guide that we discussed earlier (on the quick start guide sheet) and from that you can determine which one to use.
In this case I went for Mode A (see below, click to enlarge), which is supports this particular iMac.
You might be mistaken for thinking that the target computer is booting from its hard drive, as until about a minute (more on slower Macs) or so into the boot sequence, it looks the same as when you are booting from hard drive - the Apple logo and a grey background.
Providing you have selected the correct boot device, you will then see the "Recon imager loading" message (see below) and you can relax your sphincter. An LED on the dongle would have been nice to show me it was loading.
As Recon Imager is based upon iOS this is why it looks so similar you can't really have a Recon splash screen from the moment you boot from the Recon USB stick it just doesn't work that way, think of it as a kind of Windows PE environment.
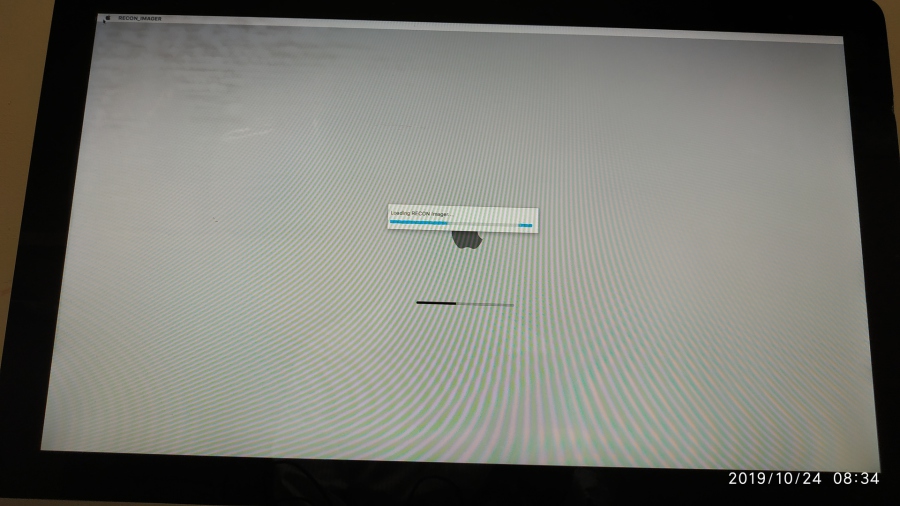 Option A Boot Screen
I also booted this iMac using Option B (see below), it has a slightly different start up screen, but the principal is the same. Option C didn't work for me on this Mac (the boot process stopped with a grey "no entry" sign) - which is understandable as it was not designed for Mac's this old.
 Option B Boot Screen
Once the program launches, there are 5 buttons (see below) across the top of the screen, keeping this super simple to operate. The last button, Licence is not visible screen shot below...
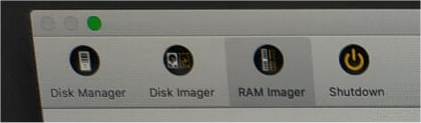 Main GUI Buttons
Below you can see I'm in the Licence screen and viewing the change log. Always worth looking at this to see what new features have been added and most importanly bugs that have been fixed. I like change logs, especially ones that are detailed like this. I'm not good with "various performance and stability improvements".
 Licencing Tab - Change Log
You can also see (above) that I am cheap as I don't have the "Logical Image" button as found in the Pro edition.
8a. Using The Product - Imaging RAM:
The first thing I tried was to image the iMac's RAM, I dug out the fabled Quick Start guide and saw that Option A worked with iMac mid 2007 or newer.
Before we go any further, Recon Imager is not like FTK Imager, Magnet Acquire or other tools that can acquire "live" memory on a Windows based PCs (meaning you run the memory capture whilst logged on to the machine).
Recon Imager (like many other, but not all tools) relies on the fact that if you "restart" an Apple computer, the contents of the RAM is not lost. So restarting the computer, booting from the Recon Imager dongle and running a RAM capture is going to lose a small amount of RAM (as the boot process and the Recon Imager program will overwrite memory), but the vast majority of it will be preserved.
Below, I have booted up and am in the RAM Imager tab, populating all the fields. I looked for the "Browse" or "Select Destination Directory" button where I could select which folder to use on the destination drive I had attached.
 Ram Imager Tab
Gotcha! I clicked around to no avail, there is no browse button, oddly whatever you type into the "Label" field on this page, becomes a folder on the root of the destination disk where the image is then saved with the same name, that's not very intuitive, but it works.
Not sure about you, but I have a neat folder structure on my destination drives eg;
PROJECT_X/EXHIBIT_A/IMAGES/RAM_IMAGE
I would not be a fan of this if I was onsite doing 800 RAM images on a large E-Discovery project where their was a workflow in place and I had to move and rename things each time!.
QOL request: Can we have some tool tips please for each field ?
Putting my programmer hat on, I would suspect that perhaps Ram Imager is so basic because it is designed to use as little RAM as possible - to avoid overwriting data in memory. I may be being to kind, but then again, it makes sense!
Gotcha! Before I took the screenshot above, my destination disk was formatted NTFS. Recon Imager does not support NTFS on your destination drive and it won't tell you that either, no error message, you just can't start the image.
It does state in the user manual that your choices of destination disk format are limited to HFS, APFS or ExFAT, so again, I reiterate to you read the manual before you use the product.
Pro Tip: ExFAT is a bit of a bodge, it is an old file system that is essentially FAT32 on steroids. Primarily designed for hardware devices (such as digital cameras, CCTV systems and the like) that store super large files (beyond the 4GB limit of FAT32). As it has zero safety or journalling features, it was an ideal file system for such devices where RAM and processor time are miniscule (there is no way these devices could support NTFS). So Steve Jobs and his team of tree huggers decided to take the easy route and implement NTFS's poor cousin ExFAT to keep the Windows ludites happy, if he didn't - you would not be able to use these devices (or the memory cards they contained) with your Mac.
You can read NTFS volumes on a modern Mac operating system, but without third party drivers (which have become quite good in recent years - see here) you can't write to NTFS volumes.
You will need to make sure that your destination drive is formatted as ExFAT if you want to plug it straight into a Windows machine and use something like Black Light (stop saying the BL word, this is Sumuri's review) or other Windows tool of choice to examine it.
You also need to ensure that you have around 50% more free space on your destination disk than the capacity of the target computers memory. Why's that ? Apple memory is compressed! Subscribe, we will have an article on that!
Starting the RAM Image:
So after sorting out my destination drive I attempted to start the image and was met by this (see below);
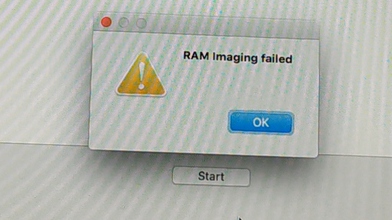 Mode A - Ram Image Failure
Hmmm, I tried this a couple of more times, but no dice, something is not right here.
Gotcha! I then looked at the Quick Start Guide again and noticed that it is not as helpful as it looks on first inspection, there is a confusing overlap as Option A states "iMac 2007 or newer" and Option B states it supports "iMac 2009 or newer".
Using Mode B (which supports newer Macs), the image completed flawlessly first time (see below, click to enlarge).
 Mode B - Ram Imager
I think this Quick Start Guide needs revisiting and cleaning up - let's lose the word "newer", perhaps "Supports iMac 2007 to Early 2009" would be a cleaner way to do it. It's a minor point, but caught me out and obviously overwrote RAM as I had to boot into another Mode of Recon Imager.
Pro Tip: You should be aware that it is possible that the Mac will crash during the RAM acquisition process, Recon Imager is not alone with this problem - other vendors tools also crash on occassion. The memory architecture is a little sensistive and sometimes a read to a certain area of protected memory will cause this to happen - your mileage may vary, but don't be surprised.
Examining the RAM Image:
The RAM image came out fine, you can parse that with your tool of choice as it is a flat file - nothing else to report here.
As I touched on earlier, Apple RAM uses compression which cannot be disabled, so don't think Recon Imager has gone bezerk when you see the "RAM Captured" progress bar go beyond the size of the RAM inside the machine!
So thats RAM done, lets move on to some disk imaging.....
8b. Using The Product - Imaging a Disk:
So now we know that a) our destination disk must be ExFAT if we wish to use it with Windows with no additional file system drives - and b) we can only image to folders on the root drive of the destination disk, lets crack on.
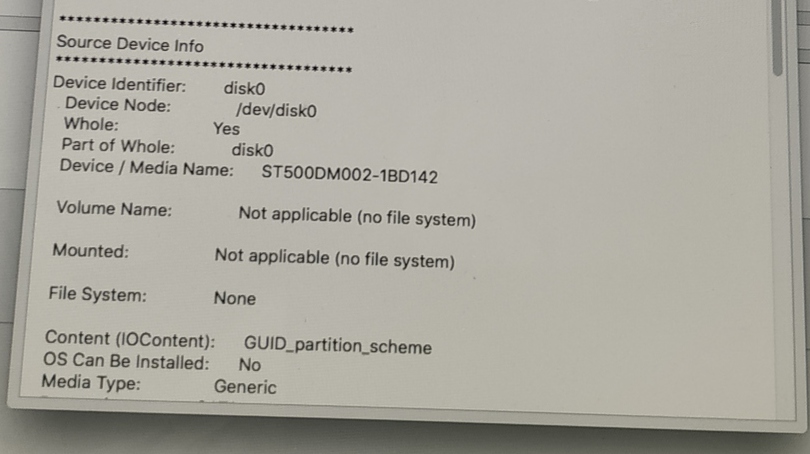
The Disk Manager Tab:
Heading over to the "Disk Manager" tab (see below, click to enlarge) we are presented with a nice clean list of all of the physical disks and volumes attached to the iMac.
Why can't EnCase have something nice and clean (and colour coded) like this ?
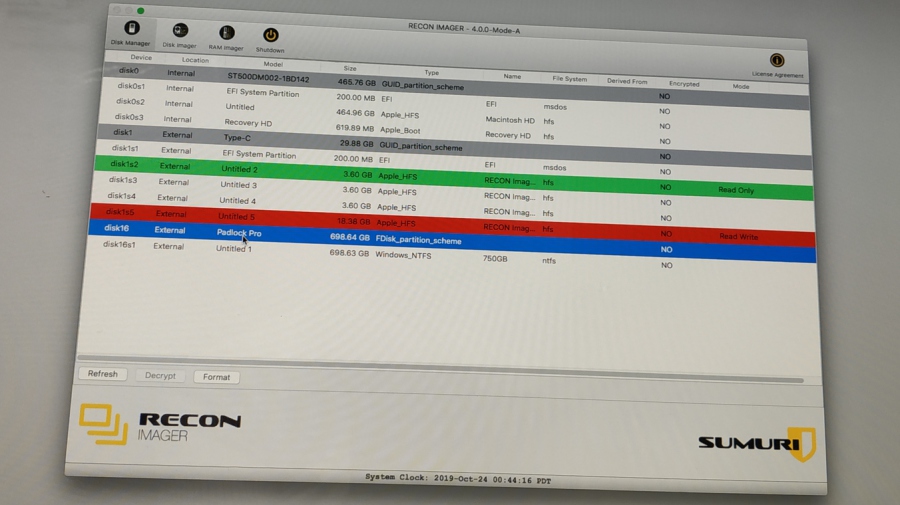 Disk Manager Tab - Fab colours!
The Disk Manager is very clearly laid out and uses a neat colour code system to differentiate the different types of disk/volume. I would have liked to have seen an onscreen key here, listing what the colours meant, there may have been one, but it was not immediately obvious to me.
You know I said about reading the manual, well it is all there, so take a look for yourself (see below, click to enlarge).
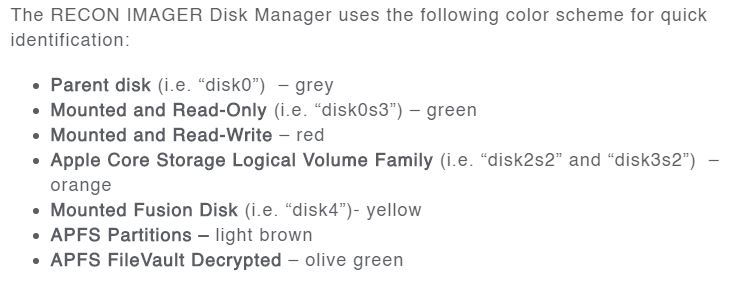 Disk Manager Colour Key
If you click the Disk Manager Tab slide (above), you will see that the first highlighted entry on the list is the iMac's internal 500GB SATA drive (this is the one you need to tell Recon Imager to image i fyou want to image the entire physical disk), it is running High Sierra with HFS+ (I have not yet got around to upgrading to APFS as there is a performance impact when using that filing system on mechanical drives such a this, so I have heard).
The next three entries on the list are the partitions on the iMac hard drive, these all have the suffix "s" after Disk0:, think of this as a volume, partition or slice, whatever you prefer.
The next entry shows Disk1: (see above) which is the Recon Imager USB stick and the next four relate to the volumes on the Recon Imager drive (Mode A, B, C and a storage partition). One of these entries is green, indicating it is the one you currently have mounted another is red, indicating it is writeable. You could use this for storage, but I wouldn't recommend it.
Further down the list you will see Disk16:, this is the destination disk that I had already connected to the machine for the image to be stored on. Note there is no "Read/Write" status next to this disk - as this screenshot was taken when the drive was formatted with NTFS.
A quick reformat to ExFAT and we are good to go. Recon Imager has a built in disk formatting tool, which I think is a terrible idea, any decent forensic workflow has all disks prepared on a machine that is nothing to do with the target machine.
Whilst the machine's internal drives are protected (not mounted) from being formatted, it would be a couple of clicks to format your destination disk which may contain a bucket load of other images, if you didn't get the whole NTFS thing we discussed earlier.
Gotcha! If you look at the previous screen shot of the Disk Manager interface, you will see the time reported is set to USA Pacific Daylight Time (PDT), as this is a product shipped all over the world, this is puzzling.
I didn't see any way to change this - it appears hard coded. Keep this in mind when you are writing up your notes or inputting data from log files into your case management spreadsheet or system. I don't recall my previous dongle doing this, I will look at some old screen shots I have of it in action and update!
The Disk Imager Tab:
So lets start imaging the internal drive, this machine appears to belong to Ronny Kray according to the custodian field (I can't remember if he was the violent one or the mental one, but my SMS is up to date, so I don't have anything to worry about), see below for the screen displayed whilst imaging (click to enlarge).
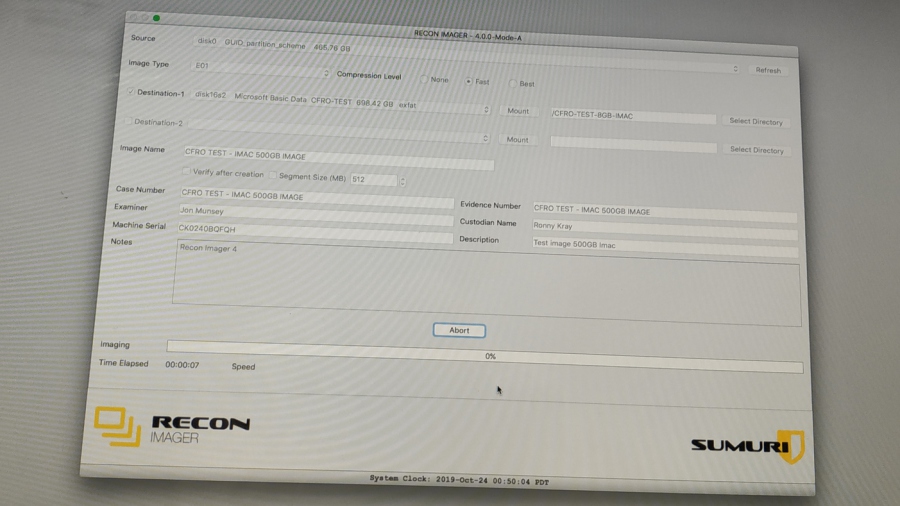
As you can see (above) it looks like any other standard imaging tool, we have populated all of our fields and imaging is in progress. Note we have the luxury of choosing where the image is stored - with those fancy select directory buttons.
On a positive note, it was nice to see the serial number of the machine pre-populated, it would be nice to have the hard drive serial number here as well, but we can't have everything (and some drives don't report their serial number properly so maybe this why it is not shown onscreen).
Imaging formats are quite varied;
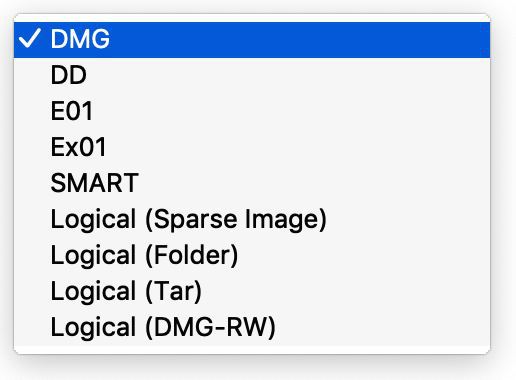
Remember you won't get any of the Logical options if you are using the Standard peasant version of Recon. Your image format choice depends on what you are planning to analyse the image with.
For maximum compatibility when analysing this image on a Mac, I would use the native .DMG format, however you can use what I deem the industry standard Encase .E01 if your tool supports it. .EX01 is the newer Encase format and support for this is not ubiquitous as the earlier .E01 format is.
I chose EnCase .E01 format, with fast compression and a segment size of zero.
We will do an article all about compression and the like, so subscribe!
Pro Tip: I did some tests a long time ago and segmented images (when you index them) have an overhead. Keeping your image in a single file does save you time at the processing stage - its a marginal difference, so don't worry too much if you have been taught to use segments. If you ever wondered why images are segmented, the main reason was your destination disk file system limitations (ye olde FAT16 was 2 GB and FAT32 was 4GB for example) or archive limitations (for example 4.7GB DVDR's and before that 650MB CDR's).
After about 3 and a bit hours, my image of the 500GB internal drive was successfully completed and verified;
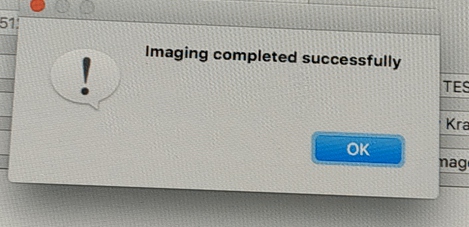 Disk Image Successful
It took so long because my steam driven iMac only has USB 2.0 ports.
Pro Tip: When imaging anything using USB 2.0, minimising the amount of data that is sent to the destination drive will radically speed up the process, so use compression. The tin foil hat brigade will argue that this is not true, but unless you have a really, really slow CPU in your machine, compressing the data (using "fast" not "best" compression) is always going to be faster than copying it over USB 2.0.
Remember you have to read the data back to verify it, verifying (reading back in) an uncompressed 500GB vs a compressed image file (this one was 14GB) means compression is a no brainer!
Imaging Summary:
Below you will see the summary that is displayed after the imaging process completes, click to enlarge;
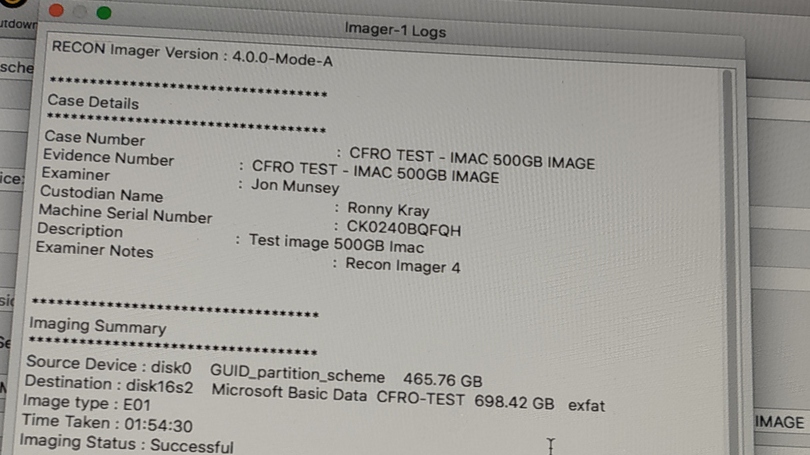
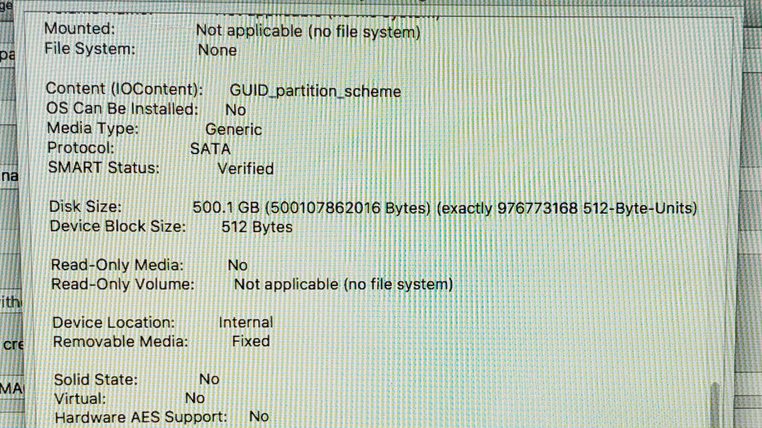 Imaging Summary Log
This all looks normal, then in the screen shot (above) we see "Read Only Media: No", I'd rather this was just not present and it was explained in my report that this actually was write protected (as it was not mounted).
Looking at the screenshot below, moving on to the end of the log file we have a nice clean section showing the acquisition hashes and the all important verification hash.
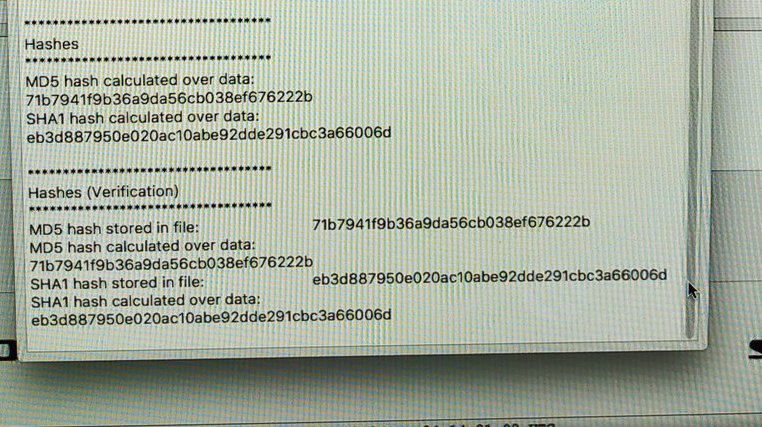
All very nice, clean and easily parsable with a script if you want to import this log into excel or a case management system.
8c. Using The Product - Examining Image Produced
Ok, so lets open up this image and see how well Recon Imager treats the .E01 format, I'm a Windows shop, so I don't use any iOS based analysis tools, so apologies to all of the Apple purists that are reading this.
As you can see below, we have a normal .E01 file of some 14.8GB which is not bad considering this was an image of a 500GB hard drive.

Pro Tip: This image is so small because of two possible reasons, firstly the hard drive in the iMac that I imaged may have been wiped before the operating system was installed, and if that wipe was with zeros or a repeating pattern then the free space would compress to almost nothing and then the operating system would make up the remainder of the 14GB of image we have. Another reason you see this sometimes, is because the machine is new and has not been used much, therefore all of the unused sectors on the hard drive contain zeros.
Conversely if the drive had been wiped with a random pattern, or contained a lot of deleted data in the free space (such as movies or music) that were essentially already compressed, the image size would of been much bigger.
If it was a random wipe, the image would may have been a little over 500GB in size - as the non-compressible random data written to all of the empty sectors, plus the .E01 error checksum data overhead would total more than 500GB!
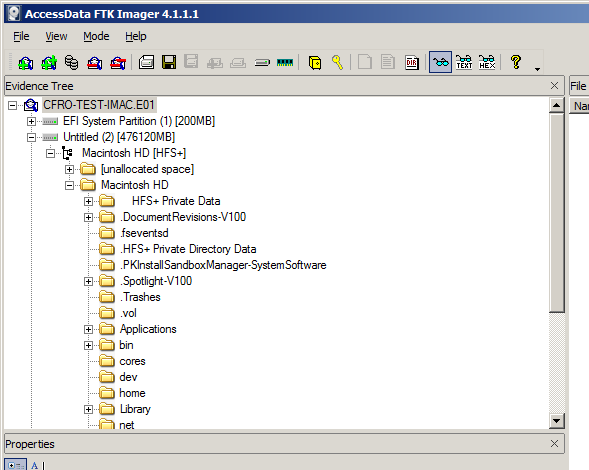
Using FTK Imager (which is free by the way - and a review coming up soon so subscribe!) I opened up my freshly minted image file...

It looks fine to me, I can see the partitions on the disk, its detected it as HFS+ and I can see the volume "Macintosh HD" which we know contains all the goodies! Lets have a look;
As we know, this disk image is of a plain old HFS+ formatted drive, FTK Imager won't be showing you any APFS formatted drives, which you will most likely come across if the Apple Mac you are imaging is running High Sierra or later - especially if it has an SSD drive. FTK Imager would show "unrecognized file system" or possibly "unallocated clusters" if you tried to open up the APFS image.
Either way, it does not matter at the imaging stage as Recon Imager has you covered and supports both formats natively.
Just make sure the tool you are using to analyse the disk image has *proper* support for APFS. Sumuri have some great analysis tools as do Blackbag. I will warn you now, your milage will vary if you use Windows based tools to analyse APFS format drives - as some of them (not all) miss data that could be vital to your investigation.
Feature Request: I would like some way of opening up the image created, natively inside Recon Imager, just so that I can check everything is as intended. This would save me having to connect the drive to another machine and open the image, to check it is good (which should be in every examiners workflow!). But playing devils advocate, I assume this is not present to avoid overwriting RAM.
Pro Tip: Ok, we are off on a mega tangent now...If you don't do many Apple investigations, the "bash_sessions" folder (seen below) within a users home folder is a nice little nugget of artefact goodness - it shows you a list of commands recently entered by this user. Obviously this file can be tampered with, but I have often found evidence of use here in past cases!
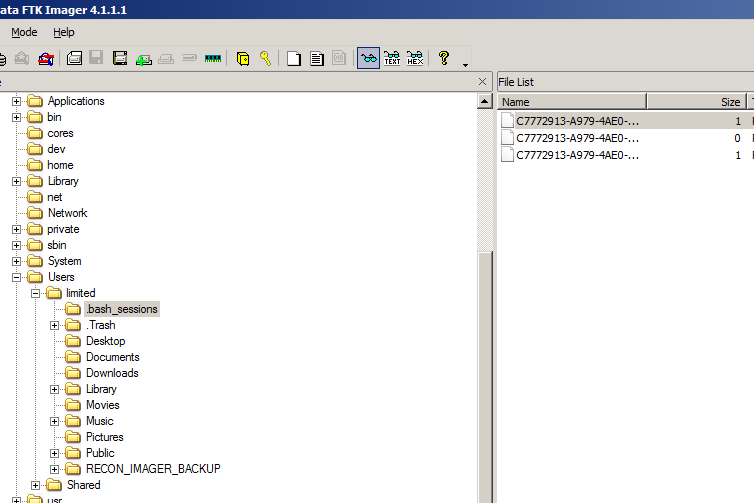
Looking at the content of one of the files, you can see (below) this is me typing in commands to update my old V3 Recon Imager dongle before it became bricked. There are no line numbers or timestamps inside the file, but hey, its better than nothing.
 Bash History Files
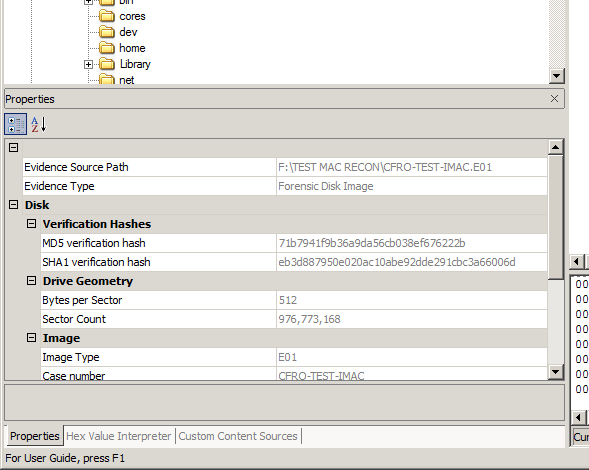
Ok, so lets look at bit deeper into this image we just created, looking at the Metadata fields I don't see anything that is broken, but I note that the "Acquired on OS" states Darwin, which if you want to be pedantic is technically correct, but I would have preferred to have seen OSX 10.x.x or High Sierra or something else a bit more logical.
Looking at the "Acquired using" field (see below), I see 2016/10/19, I would like to see something like Recon Imager 4.05 here, this date is not the release date of High Sierra (2017), so your guess is as good as mine to what this refers to.
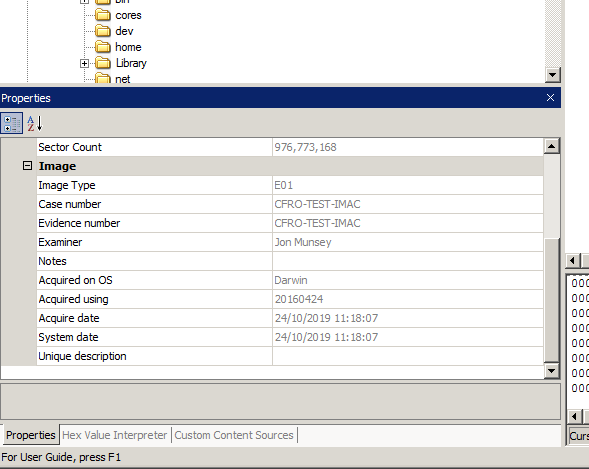 FTK Imager - Properties
I will have a look in EnCase and see whether this is an issue with FTK Imager incorrectly mapping the image's metadata fields, or if this is something Recon Imager is doing. Watch this space.
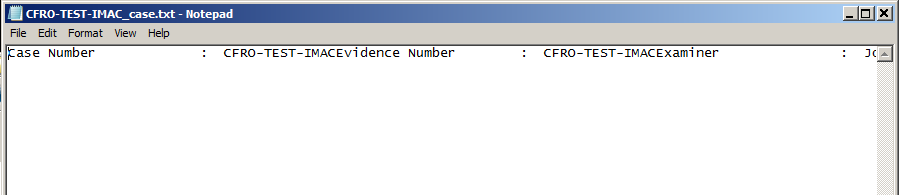
9. Log Files:
Looking at the image file on the destination shows us this little quintent of text files;

I'm not sure about you, but I think this is a bit excessive - 5 separate text files telling me that the disk imaged and verified ok. I think they are written out at specfic milestones of the imaging process, so you have something if heaven forbid, Recon Imager crashed before writing the final log file.
So what is exactly inside this smorgsbjord of log files ?

As these files are created on an Apple Mac, they use different control codes for line feeds and carriage returns (no word wrap won't fix this), so they look horrible when viewed on a Windows machine.
If you have something like NotePad+ or some other advanced text editor you may be able to fix these super quick. For me it was just a pita, but ultimately not Sumuri's fault.


The only file you need to look at is "complete.txt" as shown below, this collates all of
the information from the other 4 files into one. Section 8b. (previous) shows you the content of this file in a readable format.
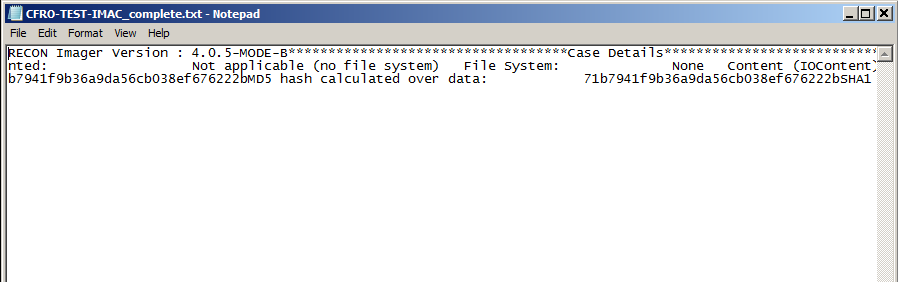 Complete.txt - The log file you want
10. Stability & Bugs:
I had no issues with stability, I was also not able to make it crash - and I tried, it was rock solid.
I must be losing my touch, I was unable to find any bugs, and I always find bugs.
A perfect score here from Sumuri.
11. Updates & Bug Fixes
Updates have been pretty frequent from Sumuri for this product, just check out the change log to see all of the major and sub versions released.
Most of which add new features, and the current V4.0.5 is the latest version of the bunch.
It is good to see that they are keeping on top of the product development, whilst I only expect to see new features in Mode B and C (as Mode A Apple computers won't be able to run new enough versions of iOS to require further development).
Apple are constantly trimming the older Macs from the newer versions of iOS, some say to make you buy a new Mac, other say to ensure the user experience is maintained (running it on a slow machine would eat into that).
This website here lists which Apple computers can run the various different flavours of iOS.
12. Support & Warranty:
Not sure about you, but support and warranty is something I have utilised for virtually every piece of forensic software / hardware I have owned - to the point of where they see my number come up on the caller display and say "its him again....don't answer"
This technology (computer forensic software) is bleeding edge most of the time and certainly bespoke - so it is most likely to encounter a problem that you need help with.
My dealing with tech support were good, no issues to report.
Out of Warranty/Support but Need Help ?
Sumuri offers paid support for out of warranty/SMS customers, how cool is that! Its a bargain at £50/$60/€55 for a 30 minute call. I would pay that any day of the week if I was stuck and didn't have the ability to stump up for a renewal or new licence. Smart thinking Sumuri.
I'm not sure if this applies to Recon Imager, but if it does, then I like this a lot. I'm sure someone from Sumuri will let me know, I'll update the review if I hear anything.
13. Long Term Test Update:
So this is the part of the review where I share with you my long term ownership of the product.
I used Recon Imager a number of times on various cases, when it was in the V3.0 guise that I purchased it in. Over a 6 month period I imaged around four devices, a mixture of Macbook Pro's and iMacs from various eras (all Intel based). I did not have any problems, nothing went wrong, zip, nada.
The wheel came off during the upgrade from V3.0 to V4.05 for me, so deep breath.....
Upgrade Experience to V4.0
An update adding features and support for more Apple Macs was released, V4.0.5.
What followed was possibly one of the most painful upgrade processes I have ever experienced. You think an FTK (Forensic ToolKit) in-place upgrade is a PITA, you have not seen anything yet.
Using my iMAC running High Sierra, this was well within the system requirements for Recon Imager I proceeded to follow the instructions in the manual, step by step, to upgrade my dongle (as it contains all of the software) to V4.
The upgrade process was clunky, involved using the command line and came across as unpolished, from a company with such an awesome reputation as being on the ball- this was a shock !!!
I mean I am a veteran of the x86 command line, you know that guy who can quote his config.sys file from DOS when he was at college 25 years ago...
Oh no... he is off on a tangent again, just indugle him, it will pass...
Files=40
FCBS=8,0
Stacks=9,256
Dos=High,UMB
Buffers=..... well you get the picture *grin*
Quick Quiz: Give yourself a real pat on the back if you can remember a) what FCBS stands for and b) if you can remember what it does. If you have to google it...pah..mortal... I'm kidding, I'm kidding...come back.....!!! First correct answer in the comments wins a roll of tin foil so you can make a new hat like mine.
Anyhoo, asking your end consumers to do things like this is a sign of the engineers being allowed to program and design the update routine, not the product experience or GUI team.... many consumers are not even going to tackle this upgrade process and they are going to be frustrated if it goes wrong.
Halfway through the upgrade process, the updater program came up with an error message and would not continue, no amount of restarts or re-running the update program would get past the error.
The Recon Imager dongle was now bricked, as I tried to boot my iMAC from it, but no dice, it was foobarred. Bugg*r....
As Billy Joel would say "Get out of my dreams...beep beep...get into my drawer":
This was 6 months into the licence of the product, in disgust I slammed the dongle in the drawer and forgot about it - we had fallen out, a lovers tiff.
Yes I know, I should have called the support team in outer mongolia (just kidding, support is USA based), but I had other fish to fry.
Will you be renewing your licence sir ?
6 months later, I receive an E-Mail from Sumuri's sales person, asking if I would like to renew. To which I replied that I was not a happy bunny and explained what had happened (and that it was in the drawer!).
So lets be clear here, I am now out of SMS, my warranty period is over.
Most companies would say "on your bike mate, you had your chance with your 12 months warranty , now b*gger off".
Suprisingly I got an E-Mail later the same day from Jason Roslewicz the CEO of Sumuri, he was on the road and seemed to be waving his magic wand from afar, directing Roni Bueno (the sales guy) to take care of this.
Is it me, or do the smaller companies;
a) still give a sh*t
and
b) react so much faster than the juggernauts of the industry that treat you with contempt if you should even dare request assistance whilst your SMS is valid.
Happiness is a Dongle Named "Recon Imager"
The end result of this is that Sumuri sent me a new dongle (the one used to do this review), to replace the old one (seen in the unboxing section) that their upgrade software bricked.
What was totally unexpected (and greately appreciated) is that they have also extended my SMS/Licence by 12 months, essentially giving me a years free support and warranty.
Now that is what I call going above and beyond. Jason and Roni, you are the best!
Am I happy ? Yes...like a pig in sh*t my friends, like a pig in sh*t, cue the Hamlet music, whip out the cigar and relax......
On a side note, they didn't know I was running CFRO (it had not been launched at that time) so this was not some knee jerk reaction to avoid bad press, it was good old fashioned customer service. Another reason to buy from them.
14. The Verdict & Score

The Verdict:
Hmmmm, Sumuri have done pretty well here haven't they, apart from the update debarkle which was quickly resolved.
Whilst they have taken a massive hit in the score for Ease of Update, they scored very highly everywhere else, so they still come away with a coveted Sizzler award from CFRO.
I feel I should point out that the program itself was rock solid and never missed a beat, so don't get hung up on the update issues - it was most likely an isolated incident.
Stability is what makes me buy things, not useless features that I will never use, Recon Imager does Disks and RAM - thats what I want and that's what it delivers.
So lets move on to the scoring;
Scoring & Awards:
| Category | Score (1-10) | |
|
Installation |
Not Applicable | |
| Ease of Use | 8 | |
| Features | 9 | |
| Stability | 10 | |
| Ease of Update | 0 | |
| Value for Money | 9 | |
| Licencing Fairness | 9 | |
| Support/Warranty | 10 |
Overall Score: 8.5 out of 10

Recon Imager is awarded the Sizzler award, which we hand out to products that are deemed really good and should be in your tool kit.
Superb documentation, amazing support and a good price round off this product, but the flawed update process kept it off the top spot of a CFRO Smash award.

Sumuri also receive the Super Vendor award for going, way way beyond what I would of expected when fixing my dongle that was nerfed by the update process, when I was out of SMS/Warranty.
Communication was fast and friendly and I was really impressed by the whole experience.
"So simple my nan could image a Mac."
"It does what it says on the tin - if you want to image Apple computers, buy this - don't waste money on more expensive products that do the same thing."
"Stop mucking about with Linux distros, this is purpose built for the job."
"If it wasn't for the abysmal update procedure, this would have been a CFRO Smash"
Don't forget to sign up for our newsletter which will keep you up to date on new reviews (and updates to existing ones) as they are posted !
Please share this article on your social networks!
Comments Section:
Please note all comments have to be approved before they are posted, just to keep the loonies out.